Manage Dairies
Before you can manage a dairy from the dairy support management tool, you need to change the dairy’s Asset settings in Salesforce. Follow the steps below to continue:
- Find the asset to be changed. Click the arrow icon
 on the far right of the asset's row and click Edit.

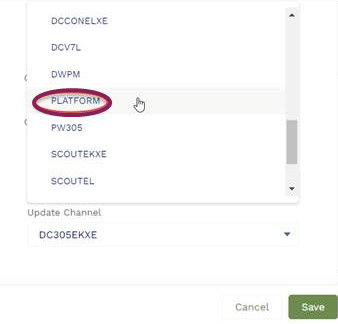
- Select Platform from the drop-down list.

- Click Save to push the new Update Channel to the VAS Curtis system and update Salesforce.


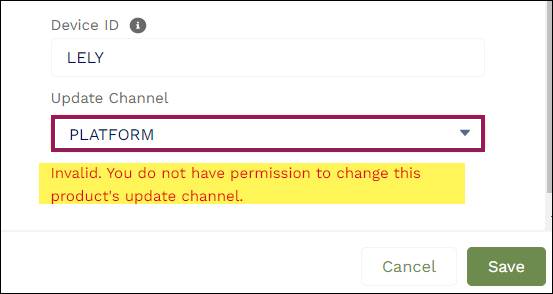
- You will only be able to change the Update Channel to Platform. If you select another option, the system displays an error message.

- You will only be able to change the Update Channel for products pre-identified as DC Servers. If you try to change the Update Channel for another product type, the system displays an error message.


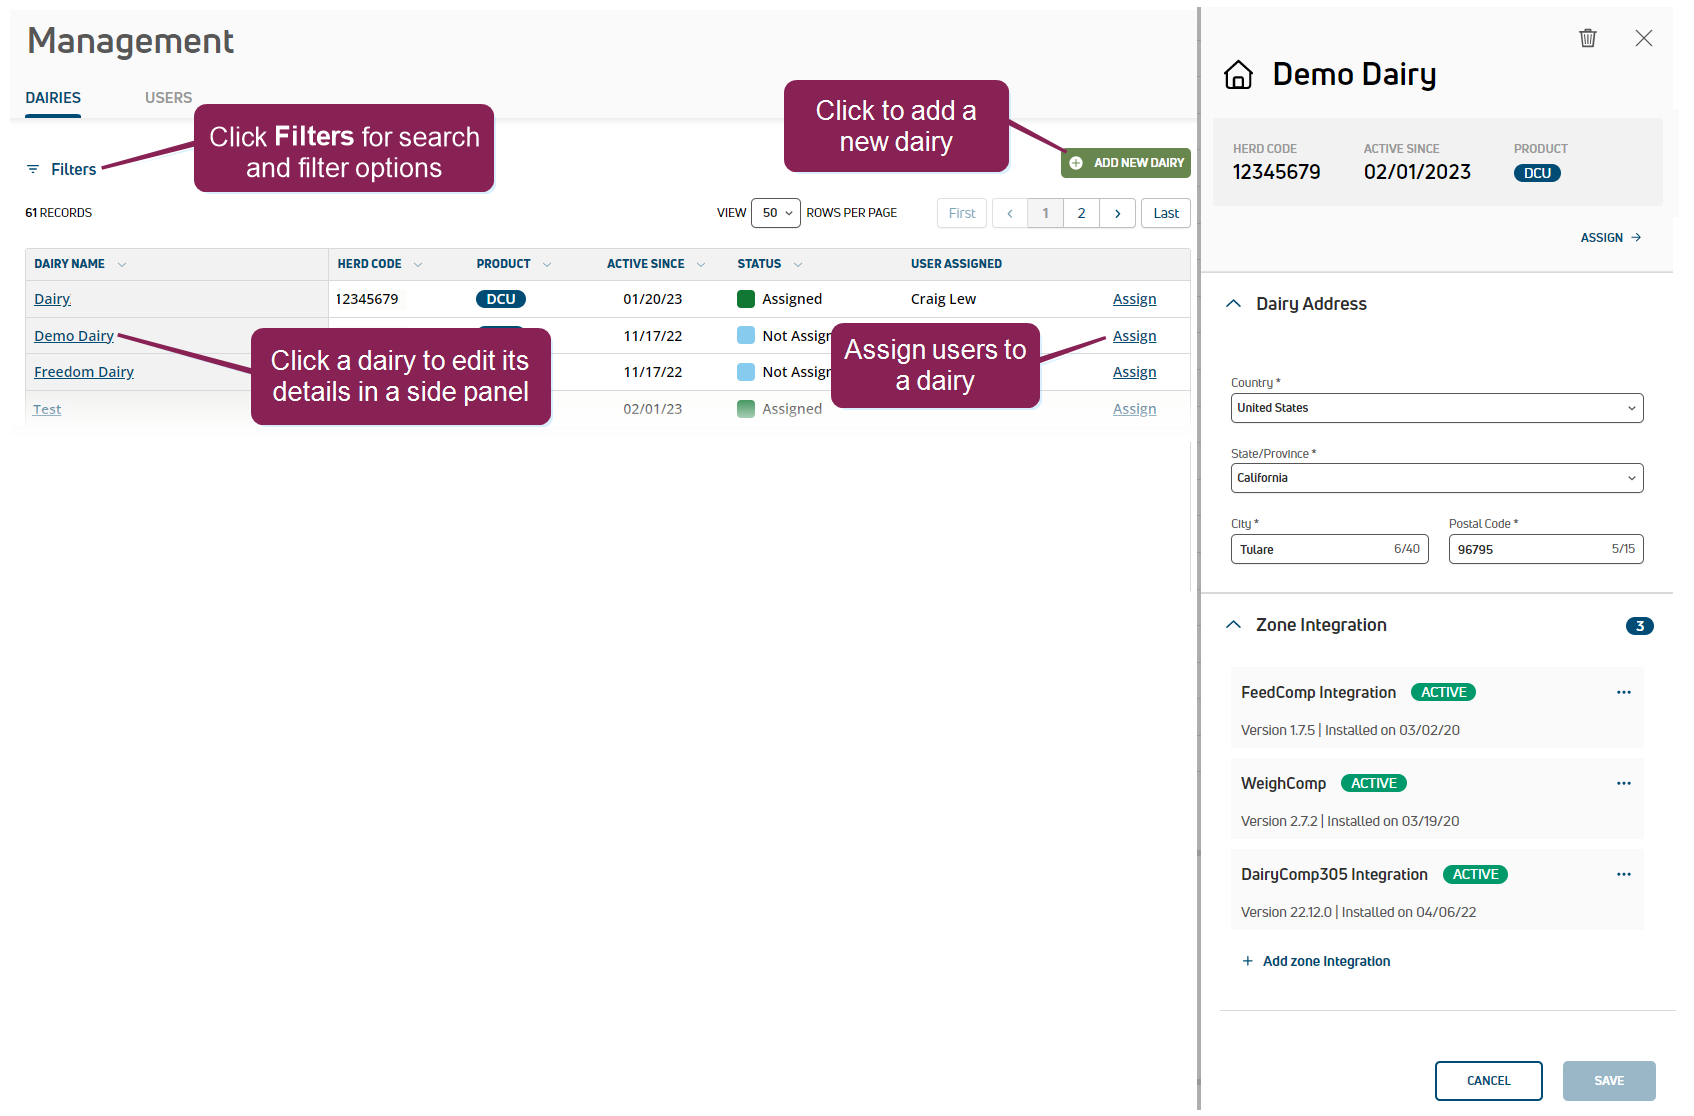
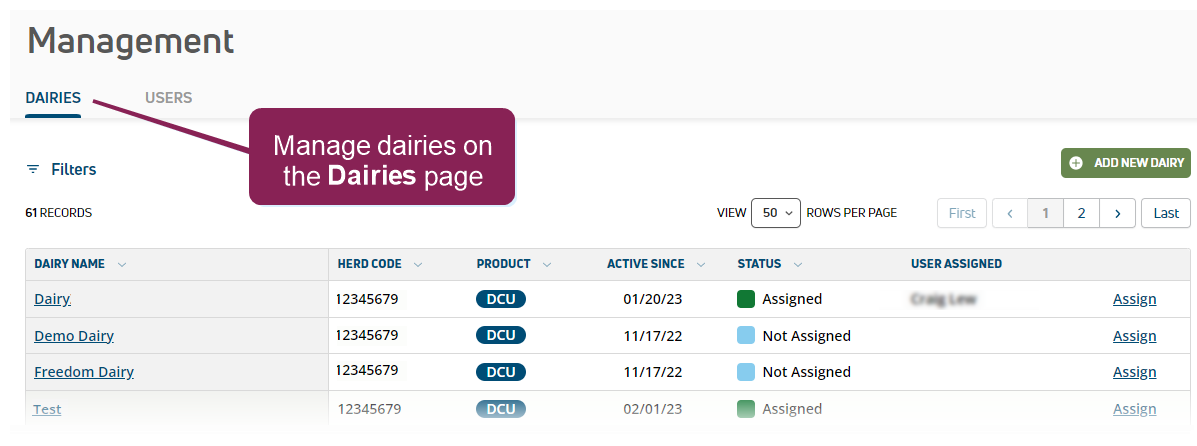
The Dairies page allows you to add and remove dairies, update the dairy's address and integrations, or assign users to the dairy.
You can also use the Dairies page to connect zone![]() The term "Zone" represents different dairy locations. Platform Zones may be different physical dairy locations (for example, multiple locations across the state or country) or different user-defined locations within a single dairy site (for example, Pens 1-100 are Zone 1, Pens 101-200 are Zone 2, etc.). integrations and reload the dairy's database from VAS.
The term "Zone" represents different dairy locations. Platform Zones may be different physical dairy locations (for example, multiple locations across the state or country) or different user-defined locations within a single dairy site (for example, Pens 1-100 are Zone 1, Pens 101-200 are Zone 2, etc.). integrations and reload the dairy's database from VAS.
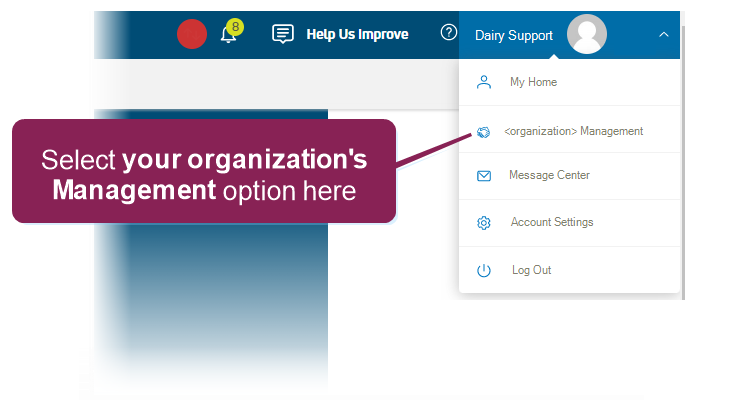
To access the Dairy Support Management Tool, log into PULSE and select your organization's Management option from your user menu at the top right of the page.
Then use the
Expand the sections below to learn more:
The steps to add a dairy differ slightly depending on the dairy type.
- Click the Add New Dairy button at the top right of the page.
- Follow the guidelines below when entering the dairy details:
- Be sure to add an accurate Expected Cow Count, which includes cows that are actively milked on the dairy and all dry animals. Do not include youngstock in this count.
- For Dairy Product Type, your region may only have one product type available and the system will default to the correct type.
- If you are adding a new MyDC dairy that does not yet have a herdcode, uncheck the This dairy has a herdcode box. The dairy support management tool will generate a unique herdcode for the MyDC dairy as part of the creation process.
- If you are adding a new MyDC dairy from a cowfile conversion, select the MyDC‑C Dairy Product Type. An 8-digit herdcode is required to add a new MyDC‑C dairy.
IMPORTANT: The MyDC‑C herdcode entered must match the herdcode in the cowfile you will use in Import a cowfile for a new MyDC-C dairy below.
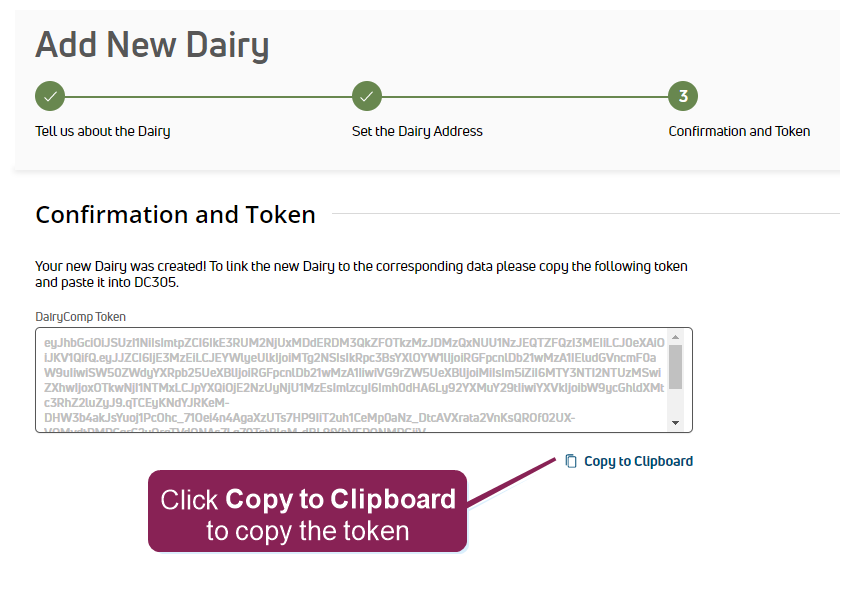
- Click Create Dairy when complete. Depending on the dairy type, proceed as follows:
- DC Unlimited dairy: Copy the token to your clipboard and use it to connect the integration in DC305
 DairyComp 305 - VAS Dairy Management Software.
- MyDC dairy: The new dairy is added and the process is complete.
- MyDC-C dairy: The new dairy is added and ready for you to import the herd data file. See Import a cowfile for a new MyDC-C dairy below to complete the required data import process.
- DC Unlimited dairy: Copy the token to your clipboard and use it to connect the integration in DC305
- Locate the dairy that needs user updates. Click Filters to access search and filter options if needed.
- Click Assign in the dairy's row.
- Select the user(s) to add.
- Click Save.
- Click the dairy to view its details in a side panel and expand the Dairy Address details.

- Update the address and click Save.
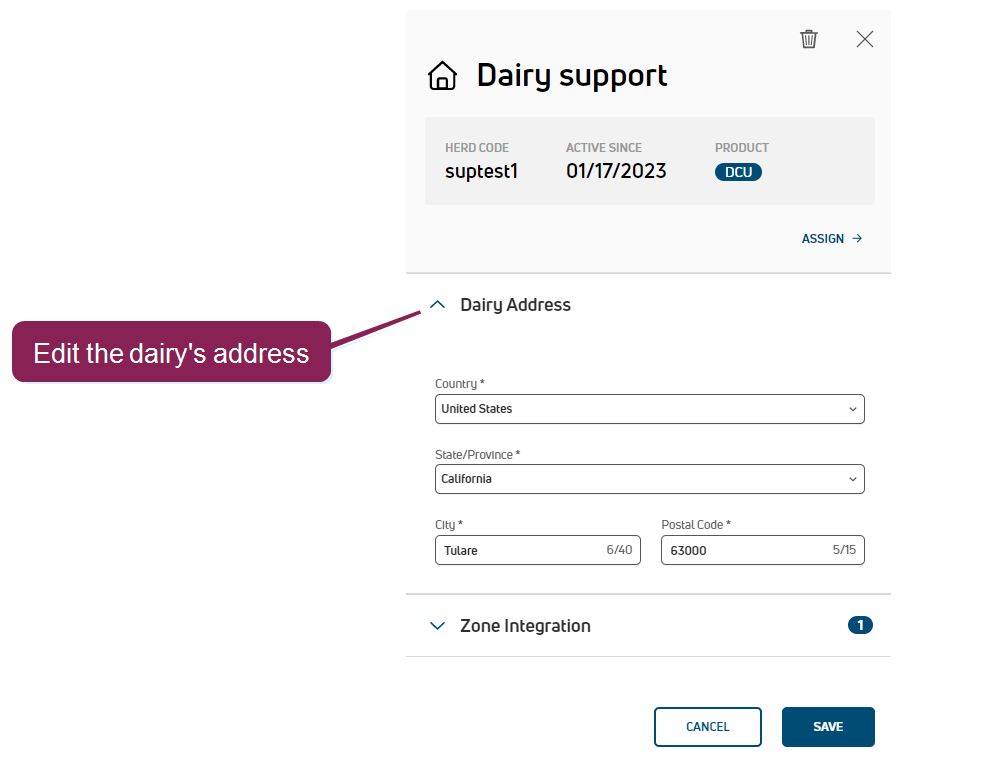
Click the dairy to view its details in a side panel and expand the Zone Integration details. If any integrations are already connected, you can view the on-premise software version and other status details.

- Click Add zone integration.
- Select the integration needed and click Save.
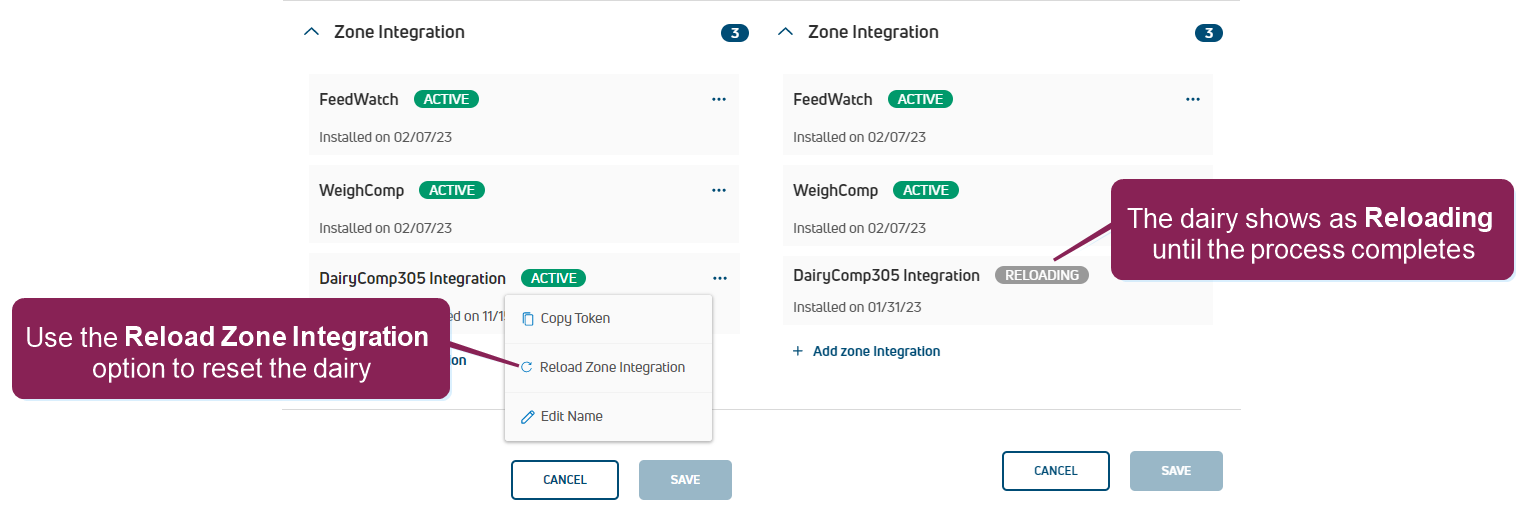
You may need to reload the zone integration if a dairy is experiencing unexpected data issues and needs to be reset to a previous version of the cowfile:
- Click the Options button
 and select Reload Zone Integration.
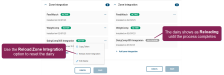
- Click Reload on the confirmation message.NOTE: The integration shows as "Reloading" until the process completes, usually within an hour, depending on the herd size and server traffic. The dairy will not be able to use on-premise DairyComp or PULSE for data entry or to view herd data until the reload completes.
You can customize the name of the dairy's integrations, which is especially handy if the dairy has multiple WeighComp integrations and you need to keep them straight. Follow the steps below to continue:
- Click the Options button and select Edit Name.
- Enter the new name and click the blue button
 to save it.
- Click the Options button and select Delete Zone Integration.
- Click Yes, Delete on the confirmation message.
After you add a new MyDC-C dairy, the dairies list includes it with this warning: ![]() Cowfile Needed. Follow the steps below to import the dairy cowfile:
Cowfile Needed. Follow the steps below to import the dairy cowfile:
- Locate the cowfile (.dat format) that matches the herdcode entered when the dairy was added.
IMPORTANT: PULSE supports the import of cowfiles up to 50 MB. Files that exceed this size result in an error.
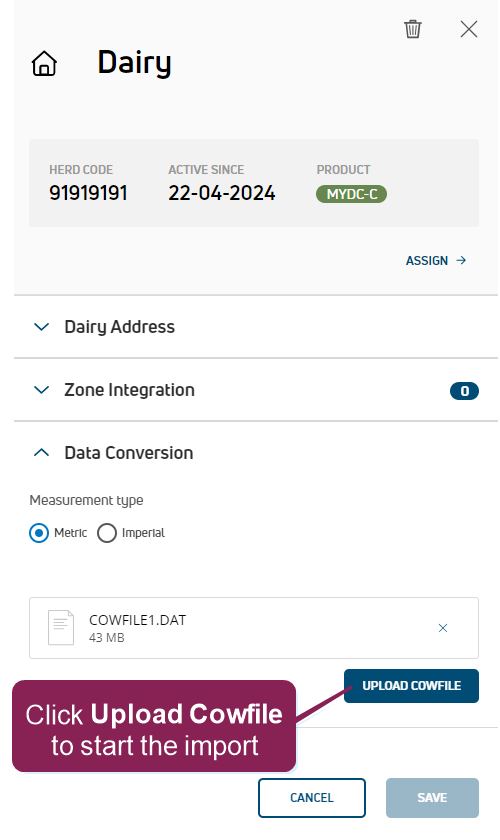
- Click the dairy to view its details in a side panel and expand the Data Conversion section.
- Select the Measurement type (Metric or Imperial) for the cowfile.
- Drag and drop your cowfile in the upload box, or click browse to navigate to your file.
- Click Upload Cowfile to start the import.

After the import completes, the file shows as UPLOADED in the side panel and PULSE sends you a notification email. The upload may take up to several hours to complete, but if your file fails to import after 24 hours, Contact Us.
If a dairy closes or no longer wants to use PULSE to manage their herd, you can remove it from the dairy support management tool. Follow the steps below to continue:
- Click the dairy to view its details in a side panel and click the delete icon
 .
.
- Click Yes, Delete on the confirmation message. After the dairy is deleted, it is removed from your list of dairies.
